![]()
Greene Comprehensive
Family Dentistry
![]()

 While many Americans hate to floss (studies show that nearly 1/3 of all Americans would rather clean their toilets than floss their teeth), flossing may still be one of the most effective ways to care for your teeth and gums. Flossing has been proven to help prevent gum disease (gingivitis), cavities, and to reduce the overall inflammation in your mouth. Gum disease has been linked to a wide variety of health conditions including heart disease, premature births, diabetes, and rheumatoid arthritis, making flossing an important part of your overall health plan.
Using floss to clean between your teeth is the most effective way to remove plaque. Plaque is a sticky film that contains bacteria that feed on bits of food or sugars that are left in your mouth after eating. When these bacteria eat, they release an acid that can eat away at the enamel of your teeth and contribute to cavities. Plaque that is not removed hardens and becomes tartar or “calculus”, a hardened substance that collects along your gum line and contributes to gum disease. Once tartar has formed, only your dentist can remove it.
Flossing prevents the buildup of tartar and removes plaque better than brushing, making it an essential part of your overall oral health routine. You should floss at least once a day, preferably at bedtime. You should also use dental floss or dental picks (and not a toothpick or your fingernail) to remove food that gets caught between your teeth.
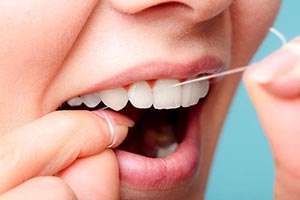
It’s important to floss properly. Follow these steps to make sure you are doing it correctly:
Start with about 18 inches of floss. Wind the floss around your middle fingers.

Hold the floss tightly between thumbs and forefingers.

Slide the floss between your teeth and use a gentle rubbing motion. Never snap or force the floss into the gums.

Once the floss has reached the gum line, curve it into a C shape around the tooth and gently slide it into the space between gum and tooth.

Holding the floss tightly against the tooth, gently rub the side of the tooth while moving the floss away from the gums in an up and down motion.

Repeat for all teeth and don’t forget to floss the backsides of your last teeth. Once you’ve finished, throw the used piece of floss away, and always start with a new piece of floss. (Source: The American Dental Association)
In addition to your routine flossing, you can use a water flosser to help eliminate any particles that brushing and flossing can leave behind. Soft picks like those from Dentek or GUM can also be helpful when removing food from between your teeth when you are away from home.
Once you get into the habit of flossing, you’ll find it’s not as unpleasant as you might as thought! You are also likely to have better visits to the dentist and fewer cavities. If you have questions about flossing, let us know! Our dentists and hygienists will be happy to help you learn to floss correctly.